To prevent unwanted parties or hackers from getting access to your confidential files, it is important to secure your files. This can be done through encryption – when a file is encrypted, the information in the file is scrambled up such that it is unreadable without a password.
This means that the chance of unwanted parties or hackers accessing your confidential files is tremendously reduced.
Good news is that you can encrypt your files for free, thanks to Open source softwares like 7Zip.
In this article, I will share with you the step-by-step process in using 7Zip for your password protection needs.
How to 7zip files: A step-by-step guide
1. Download 7zip For Free
- Go to https://www.7-zip.org/download.html
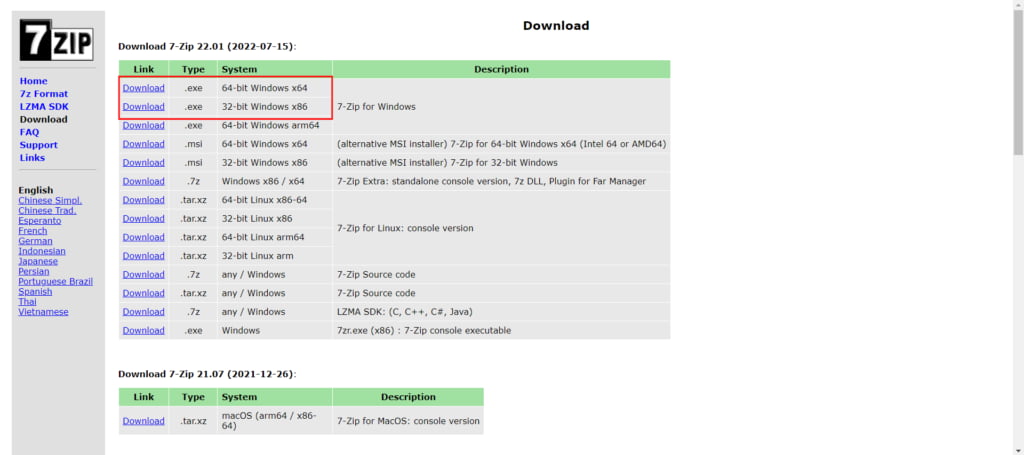
- Download the 7-zip version that is most suitable for your monitor
- For windows, select either the 64-bit version or the 32 bit version. If you are unsure of what system type you are using, go to your Desktop → Settings → System → About. You will be able to find your system type under ‘About’.

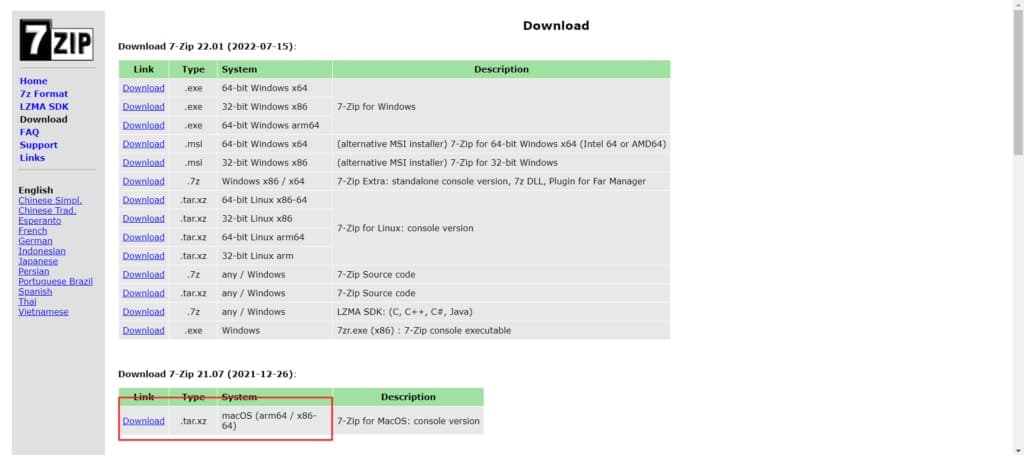
- For mac users, there is only one option.

2. Open the 7zip File Manager on your monitor

After you have downloaded the 7zip file, you can proceed to install the .exe file. Once installed, open the 7Zip file manager.
3. Encrypt Your File(s)

Now it is time to encrypt (also known as password-protect) your file.
- Find the file or folder that you want to encrypt
- Click on’Add’ at the top left
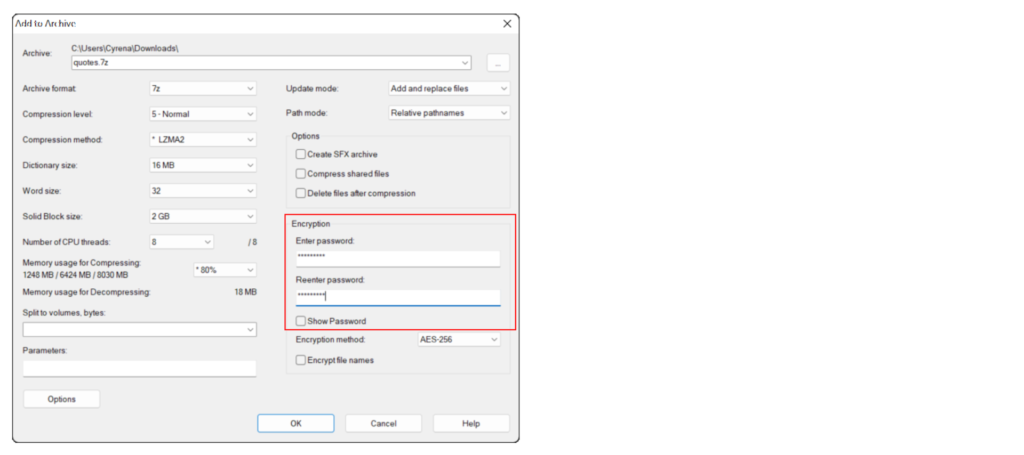
- Under Encryption, enter your password
Wala, the file is now encrypted!
